This quick start guide is designed to help you get up and running with Xpanel, including how to create tags, make simple switch/lamp objects, create trend graph objects, and run a simulator. Whether you're new to Xpanel or just looking to brush up on the basics, this guide will provide you with all the information you need to get started and make the most of this versatile software. So, let's dive in!
To set the IP address to the Xpanel, open the Xpanel Config pop-up window using the three corners method, then tap Exit. Please see below for guidance.

Once the Ethernet Loader page appears, you may start configuring the settings in order, as the screenshot below. Please note that an IP address must be available to prevent communication interference by another device that has the same IP address assigned.

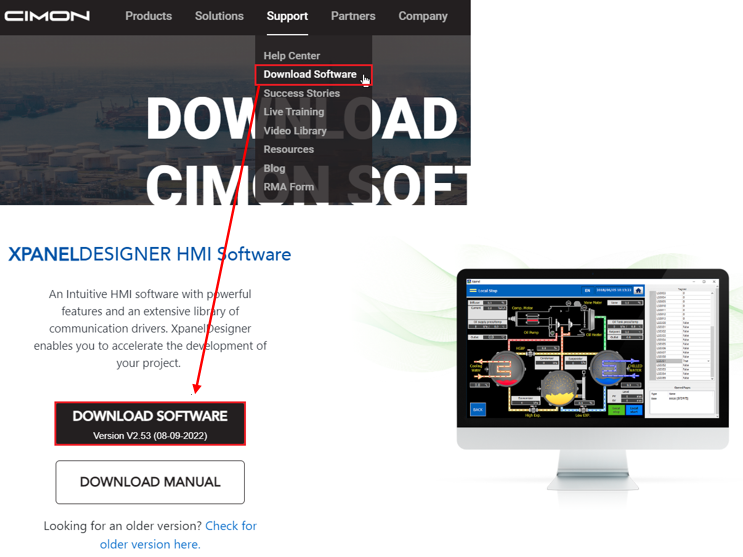
To download the software package, sign up for an account on our website and authenticate your account through your email. Next, login to www.cimon.com, hover your mouse on the Support tap and select Download Software from the dropdown menu, scroll down to the XPANELDESIGNER HMI Software section, then click DOWNLOAD SOFTWARE. You will then receive a zipped file containing the installation package.
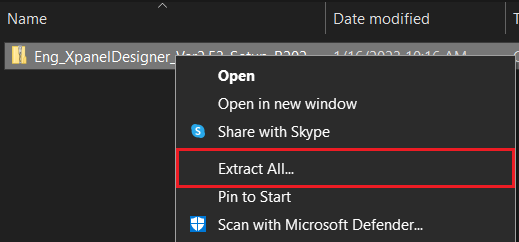
Right-click the zipped file, and Extract All.
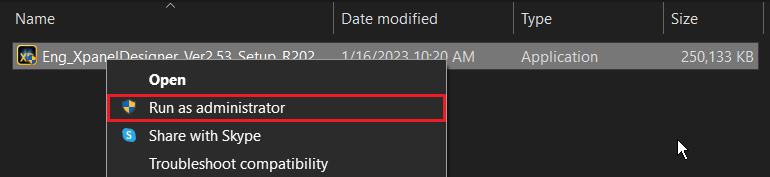
After extracting the zipped file, right-click the Eng_XpanelDesigner_Ver2.53 setup file and click Run as administrator and follow the prompts to complete the installation.
Once you have successfully installed the software, open the XpanelDesigner application. You will notice the Select Start Project pop-up menu. To begin your own project, click on New Project, click OK to open the Project Configuration Wizard, or click File and select New Project… from the dropdown menu. Give your project a name (required) and a description (optional).

Let’s begin by creating a few tags. Then, we will display the tags on the canvas and on a trend graph. First, navigate to the Database, then click the New Tag icon as shown below. There are 4 different types of tags. Group tags provide a directory system for organizing your tags. Digital tags are Boolean (0 or 1), analog tags come in various data types (INT16, UINT32, DCD8, Float, etc.), and string tags store a group of characters (numbers or letters).
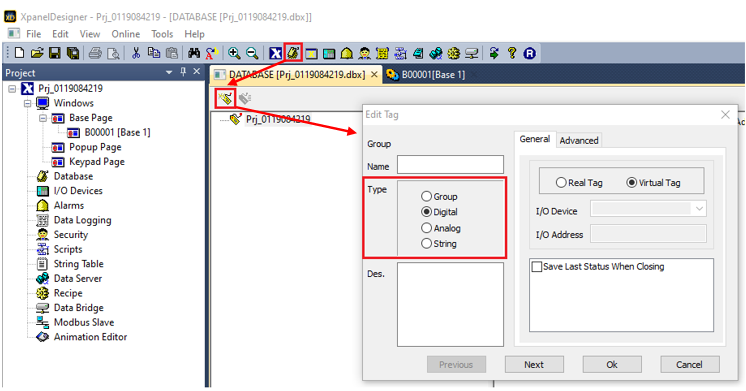
For this guide, we will make one digital tag, one analog tag, and one string tag. The digital tag will be named DIG, the analog tag will be named ANA, and the string tag will be named STR. After creating these tags, your Database window should look like the one below.

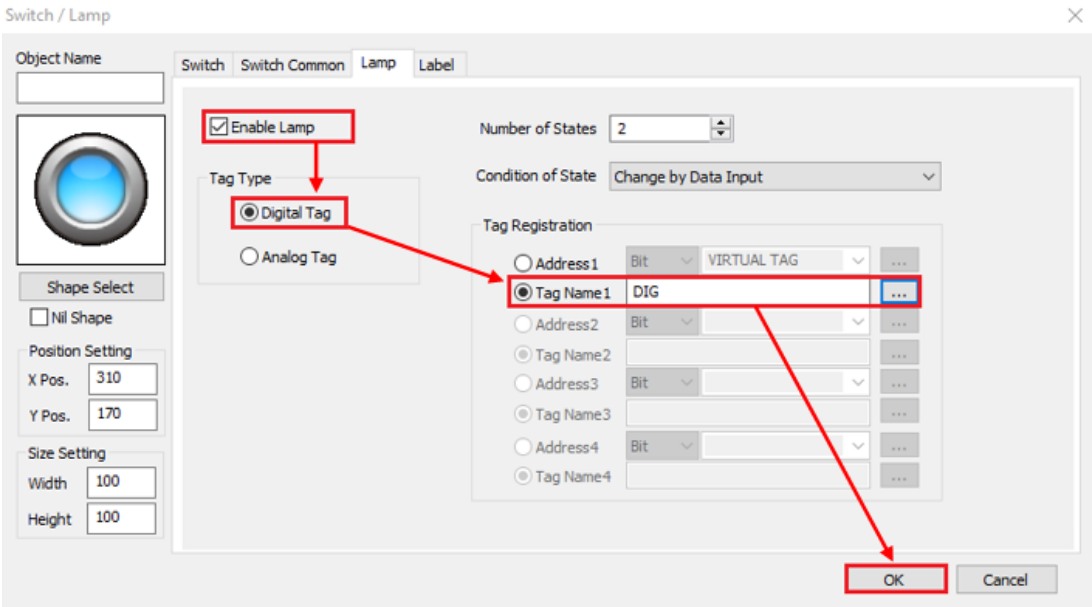
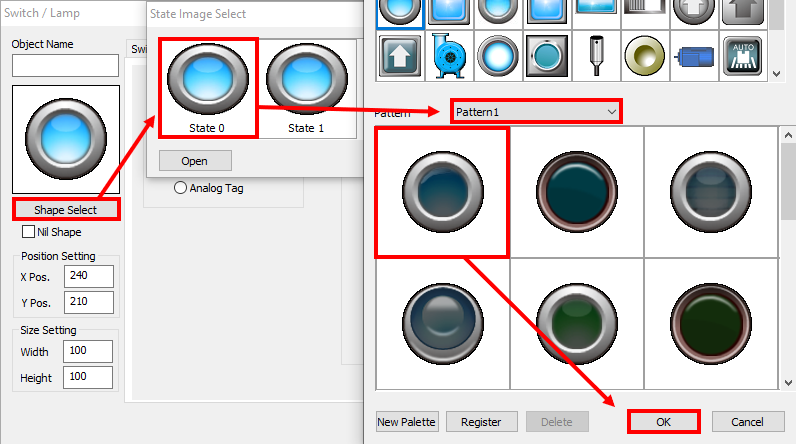
To make a Switch/Lamp button, go back to your base page, as the Draw dropdown menu will not show in the toolbar if you are still in the Database window. Once on the base page, find the Draw dropdown in the toolbar and select Switch/Lamp and click anywhere on the canvas. We will use the DIG tag. First, uncheck the Switch Function box in the Switch tab and navigate to the Lamp tab. Then, check the Enable Lamp box, select the DIG tag for Tag Name 1 and click OK. Next, click Shape Select and double-click State 0 to select Pattern 1 from the dropdown menu, and choose the first image and press OK. Press OK again to exit the creation of the Switch/Lamp. Follow the arrows below for proper configuration. Whenever this button is clicked, the value of DIG will toggle between 0 and 1.

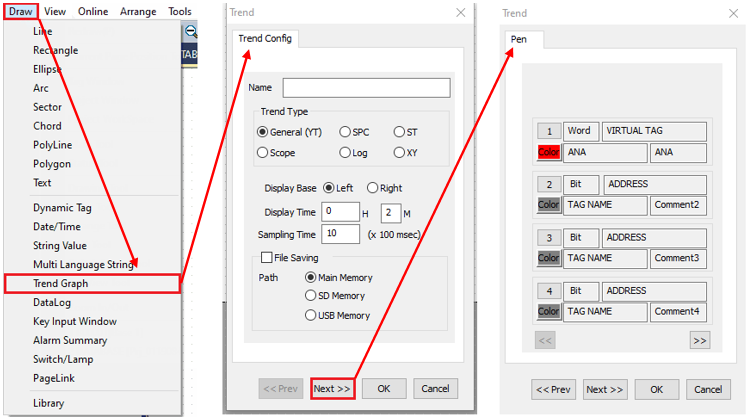
To display your data historically, a Trend Graph is appropriate. In the example below, only the tag ANA will be assigned to the Trend graph. Click on the number 1 in the Pen tab and select ANA as the display tag.
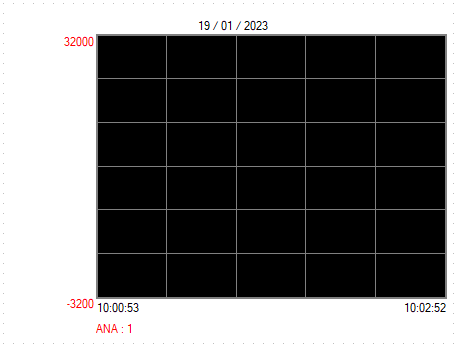
A default Trend graph showing ANA as data will resemble the figure below.
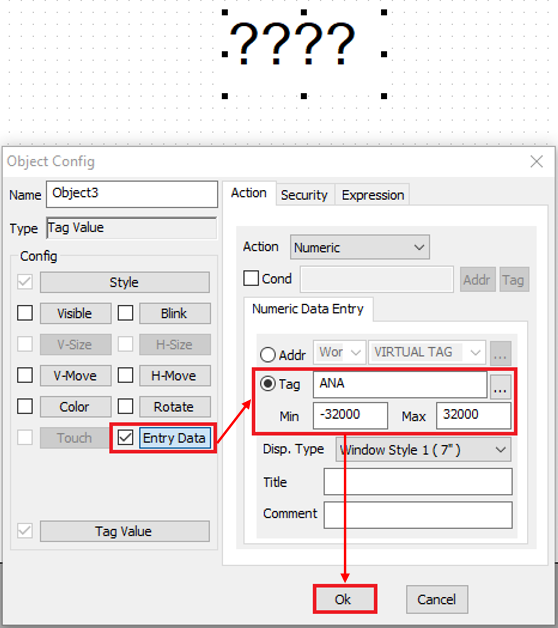
On the canvas, we will create an interactive object allowing you to view and modify a tag value in real time. Go to Draw on the toolbar, choose Dynamic Tag and click anywhere on the canvas. Afterward, select the tag to be displayed, then click Ok. ???? should now appear on your canvas.
Double-click on the ???? to bring up the Object Config window. Use the Entry Data feature to input values to the tag (as shown below).

Run a simulator of your project to test your creation! Go to the Tools dropdown and click Run Simulator with Active Page.

If you have any questions about getting started, don't hesitate to reach out to our team of experts at support@cimoninc.com.